Intarsia Yves Laforest
Le bois, cadeau de la nature

INTARSIA
Qu'est-ce que l'intarsia? Une réponse simple: c'est comme du vitrail, mais avec du bois… Personnellement, j'ai connu l'intarsia lors d'une exposition de la Foire du bois de St-Hyacinthe. J'y ai acheté (entre autre) un livre sur la fabrication de cadenas en bois. Ce livre m'a coûté plus de $4,000.00! Il est venu avec un banc de scie, une dégauchisseuse, un planeur, une scie à chantourner, une perceuse à colonne, 2 sableuses et tout plein de bois !!!
La façon de confectionner une pièce d'instarsia va varier un peu d'un artisan à l'autre. Voici ma façon de procéder, en 6 étapes:
Voyons un peu plus en détail ces différentes étapes.
Le choix du bois
Dans mes pièces d'intarsia, aucune teinture ou peinture n'est utilisée. Les couleurs vont être choisies en fonction des différentes essences de bois; blanc, rouge, brun, orange, mauve, etc. Actuellement, je travaille avec une trentaine d'essences différentes.
Ensuite, je regarde la texture du bois. Si je désire une apparence lignée (ou nervurée), avec des points (piquée), des vagues (frisée), avec des reflets, etc., il m'est possible de choisir une essence de bois qui m'offrira ce genre de détails.
Vous pouvez en voir quelques exemples ci-dessous. Pour en voir beaucoup plus, vous pouvez aller sur le site du magasin de bois exotique de St-Eustache (www.bois-exotique.com) ou sur celui de KJP Hardwood d'Ottawa (https://kjpselecthardwoods.com).


La découpe des pièces
Une fois les essences choisies, on passe à la découpe. Personnellement, je pars d'un plan sur papier duquel je découpe chaque pièce. Ensuite, je colle chaque pièce à l'aide d'une colle temporaire (un peu comme les Post-It) sur une pièce de bois et je la découpe à l'aide d'une scie à chantourner. Cette scie utilise des lames très fines qui permettent de tailler de façon très précise. La scie que j'utilise est une Excalibur avec 30 pouces de gorge; cela signifie que je peux y tailler des pièces qui auraient jusqu'à 29 pouces de longueur. 29 pouces n'est pas si long lorsqu'on fait de grosses pièces.
Dans certains cas, lorsque la pièce est longue et la découpe relativement droite, je vais aussi utiliser la scie à ruban. Comme elle coupe beaucoup plus rapidement, cela fait gagner du temps mais on y perd un peu en précision.
Au fur et à mesure du découpage, je dois m'assurer que toutes les pièces s'imbriquent le plus parfaitement possible.

Le sablage de façonnage
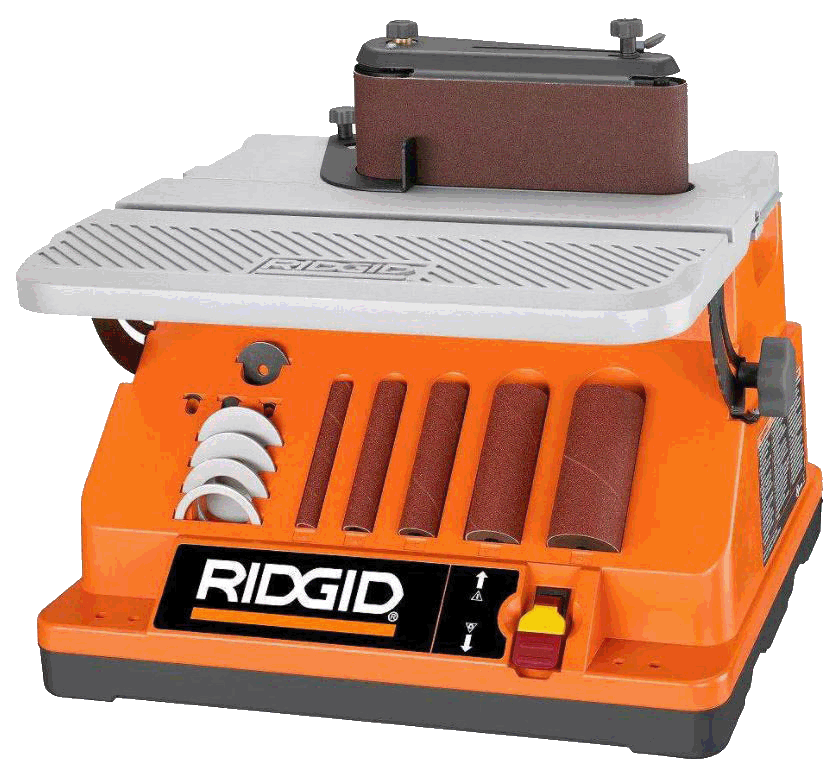
Les pièces sont découpées. Excellent. Nous avons maintenant une pièce "plate" qui ne présente aucun relief. À cette étape, la pièce ne présente pas un grand intérêt… À l'aide d'une sableuse à courroie (ci-contre) avec un papier très abrasif, je vais sabler la pièce pour lui donner le relief que je désire avoir; je vais faire un enfoncement ici, donner un angle là, etc. À la fin, la pièce nous donnera une impression de 3 dimensions.
Dans l'exemple ci-dessous, nous pouvons voir la tête de loup avant le façonnage (à gauche) et après cette étape (à droite)


Le sablage de finition
Lors du sablage de façonnage, j'ai utilisé un papier sablé assez agressif qui enlève beaucoup de bois mais qui laisse aussi beaucoup de stries dans le bois. À cette étape, je vais aller sur la sableuse qui utilise un manchon pneumatique sur lequel est monté un cylindre de papier sablé assez fin. Progressivement, je vais sabler pour faire disparaître les stries et donner une aspect soyeux à la pièce.

L'assemblage
Enfin! Toutes les pièces ont été découpées et sablées. Nous en sommes au montage. C'est une étape assez simple qui demande tout de même de la précision afin que tout s'emboîte parfaitement.
Je découpe un morceau de contreplaqué très mince ou de "lauan" qui me servira d'endos. J'y colle toutes les pièces, les fait tenir en place avec des poids en métal et je laisse sécher le tout 5 ou 6 heures. Ensuite, je retourne à la scie à chantourner pour découper la pièce d'endos en suivant le contour de la pièce pour ensuite aller sur la table à toupie pour faire une coupe de finition à 45 degrés. Sablage du contour et la pièce est prête pour la finition.


La finition
Je vais être bien honnête, comme un grand pourcentage des artisans qui travaillent le bois, c'est l'étape que j'aime le moins...
Personnellement, je termine la pièce en y vaporisant quelques couches de laque avec un léger sablage entre chaque couche. Cela donne un beau fini un peu lustré.
Crochet et/ou rainure à l'endos, la pièce est prête à aller au mur! Aussi simple que cela!
